Creating plant perfection
How to design a border
A 10 step guide to creating stunning floral displays in your garden
Over the garden wall
The Grass is always greener
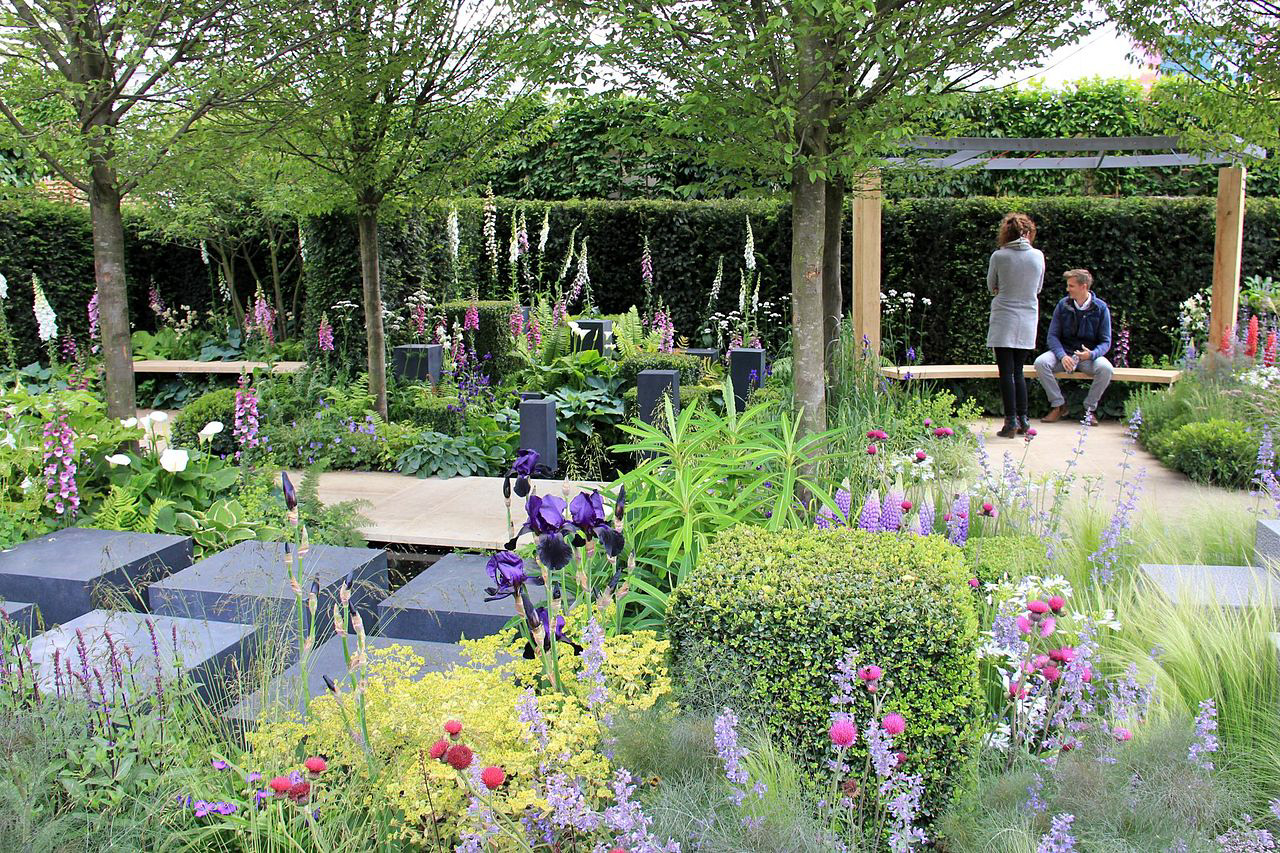
We have all been amazed by beautiful borders, whether we see them when we visit a great country house or when we admire Monty Don’s garden at Longmeadow or see those incredible show gardens at the Chelsea Flower Show. Yet when we look at our own borders, we are sometimes less than impressed.
Sometimes our attempts to make our gardens beautiful somehow never seem to work. What we plant looks out of place or at worse, sadly dies.
So here to help is a nine step method for creating great borders.
Step 1. Know your garden.
You cannot hope to create a fabulous planting border unless you know the conditions that plants face once they are in your garden. The following list explains what you must consider.

Understanding
Soil
This is one of the most important things you need to know, to find out your garden’s soil type.
This is a complex subject which deserves a blog post in it’s own right but if you know what type of soil you have you can then choose plants that will thrive there.
There are four main soil types:
- Chalky
- Sandy
- Loam
- Clay
Your own garden soil could be a mixture of these types, a sandy-loam for example.
For more details on soil types have a look at this article from the RHS.
Note: your garden may have different soil types in different areas. My own garden is predominantly a free-draining sandy-loam, but a I have a spot that has a high clay content and another area that is very sandy indeed.

Measuring your
pH
The pH scale is the measure of acidity and alkalinity in the soil.
Some plants are happier in different pH conditions.
Rhododendrons prefer acid soils, whilst Lavender, Honeysuckle and Lilac prefer Alkaline soils.
You can measure the PH of your soil using a soil testing kit, or a measuring probe.

Knowing your
Rainfall
How wet does your garden get to be – is it saturated with rain all year or is it a parched desert.
Growing thirsty plants in very dry conditions will not be successful unless you are prepared to regularly water them or provide irrigation.

Consider your garden's
Exposure
Is your garden open to the elements, is it sheltered or a mixture of the two?
Wind exposure causes havoc with plants, it can desiccate leaves, dry the soil or rock the roots.
Even the most sheltered plot can have wind tunnels that cause isolated damage.
Slopes and dips
A sloped garden has its own complications – rainfall may wash away nutrients from the top of the slope and water may run in rivulets and damage plant roots. At the bottom of the slope or in dips in the garden, water may collect in pools in warmer weather or become frost pockets in the winter.
Be aware of the
Light
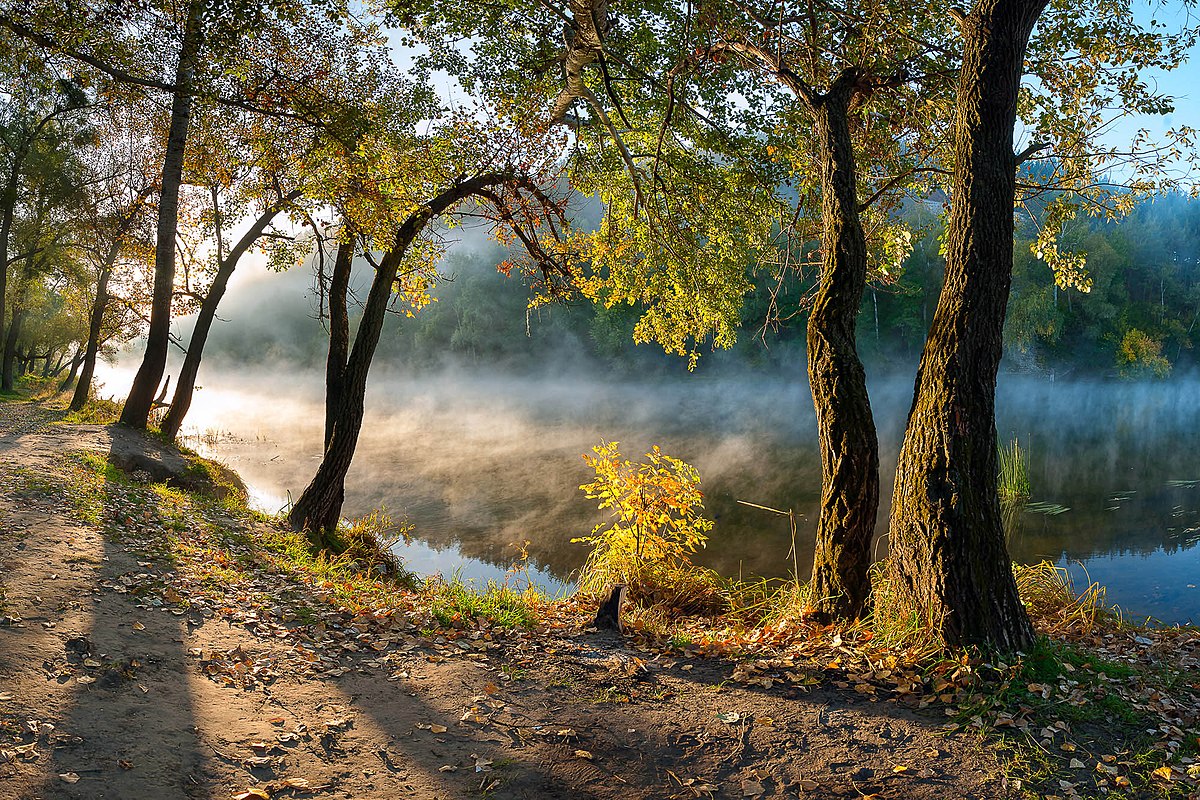
How much sunlight does your garden and house get and when?
In the Northern Hemisphere the tilt of the earth means that south facing walls or fences get the most sunlight, whilst north facing walls remain in shadow. This reverses south of the equator. East and West facing walls area also affected differently. East facing walls get the morning sun which though bright is still quite cool, West facing walls get the full force of the afternoon sun and can get very hot.
Away from the walls in the centre of the garden are areas which get sunlight all day these, especially lawns, can become very dry and parched.
As the day progresses certain parts of your garden dip into shadow. In the morning, long shadows are cast from north and west facing walls with the east and south facing walls enjoying the sun. As the day progresses the west facing walls become bathed in light, the east facing walls descend into shadow whilst the south facing wall still remains in the sun. North walls get very little sunlight at all. This also changes throughout the year with longer shadows in the winter and more sunlit areas in the summer.
Temperature
How warm or cold does your garden get and for how long. In the height of summer when the days are long and warm it is easy to forget the damp and icy conditions of winter. Tender summer plants can suffer and die in icy conditions.
Always consider
Right plant, right place
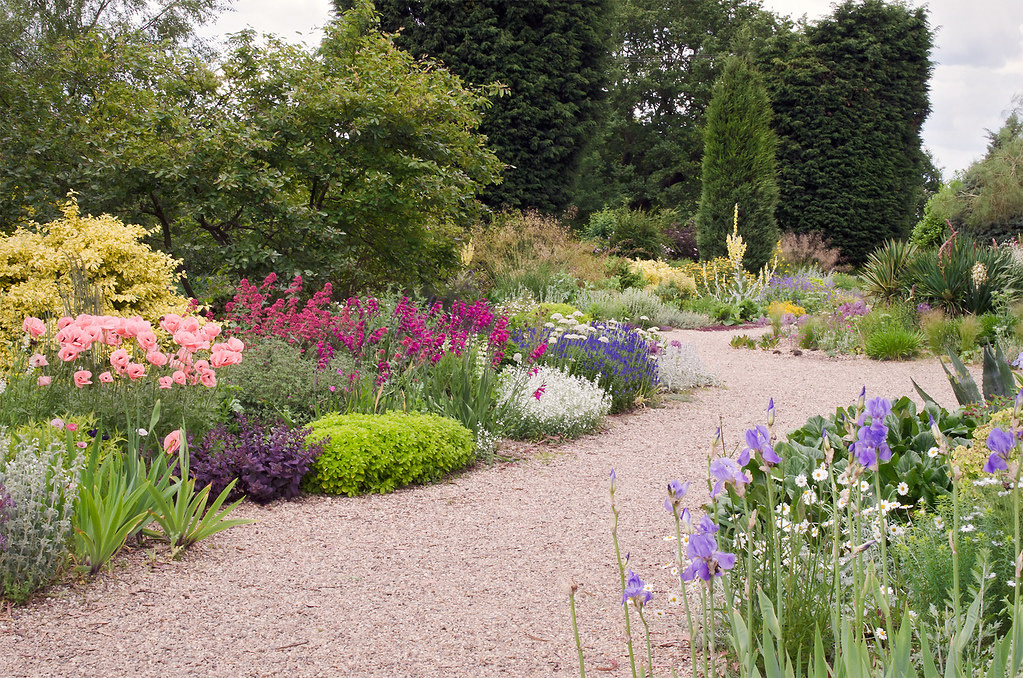
In our gardens most of the plants that we buy end up perishing because they are planted in areas or conditions unsuited for them.
A sun loving plant will struggle in the shade, an acid loving shrub such as a rhododendron will suffer in alkaline soil.
This can be countered for example, by growing a shade loving plant in a less sunny area or growing plants that are happy in particular soil conditions. Similarly it is advisable to grow plants that can tolerate wind in exposed places.
Step 2. Analyse Your Site
Now you know the conditions and issues that can affect your plant you need to make notes on where these problems occur.
If you are able to, take a year to do a site analysis. Note things like:
- The coldest and warmest temperatures and when they occur
- The average temperature for the month
- How much rain you get and when? Does the water collect in dips or troughs.
- Your soil type – check this every 2m (6ft) or so, you’ll be surprized at the differences from place to place
- Your soil pH – again check it every 2m
- Note how much wind you get, when and where does it blow, do you get regular squalls that blow in certain places
- Finally and most importantly, note the amount of light and shadow your garden receives throughout the year. Which walls or areas receive the most sunlight and when. Does the heat cause any issues such as dry and desiccated ground.
Step 3. Make a Plan
Before you consider adding your plants, you need to make a plan of your garden or bed.
This topic is a little too long to fit in this post so here is a link to the best online description of how to do it, courtesy of the garden design college I graduated from: Oxford College of Garden Design.
Step 4. Understand Form and Structure
Now you have your plan and know what conditions your garden has you can plan the plants and trees that will fill your space. Initially you need to decide on the larger plants that will give your garden form and structure.
Use borrowed landscape
Your neighbours may have trees or shrubs in their garden which may look interesting and are visible from your own site. Or their may be views to distant hills or woodlands that are worth looking at. This borrowing of external views can make it easier to design a space. You can make that beautiful scene or your neighbours fabulous shrub look like they belong in your garden own by creating structured planting that frames or accentuates those views.

Plant Types
Plants come in four main types
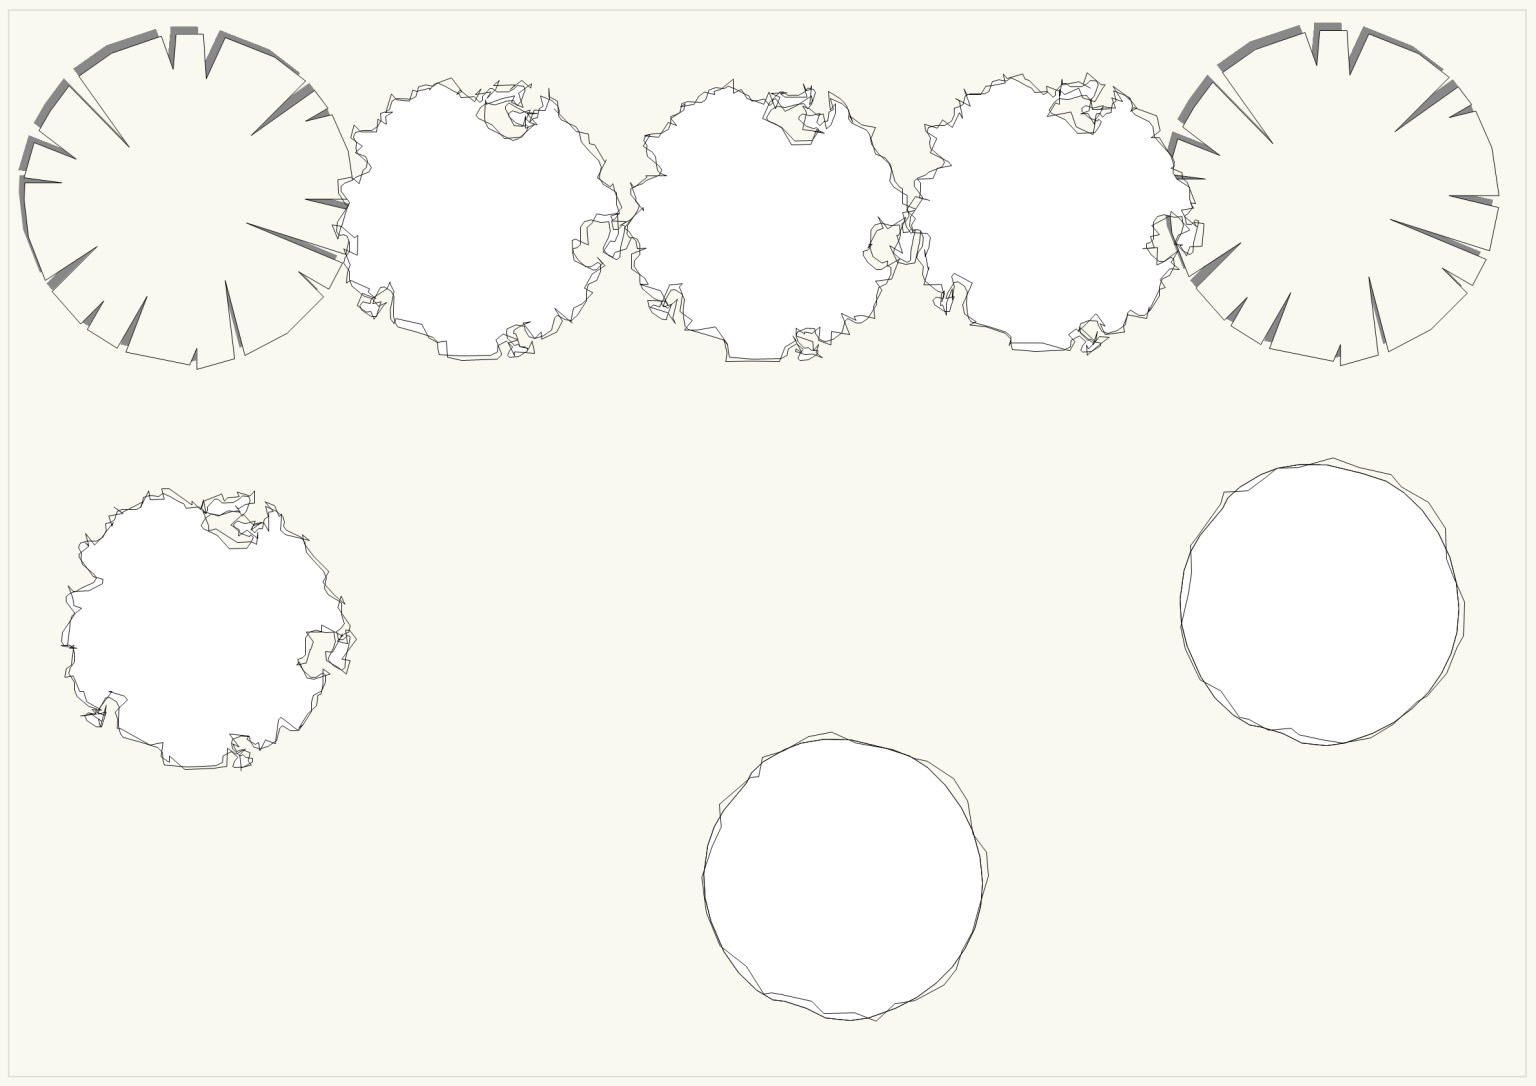
Trees
- Any garden no matter how small benefits from a tree or two
- They are wonderful in so many ways as they can become focal points, attract birds and other animals, block unwanted views and also provide shelter from strong winds
- They also help connect the garden to the sky, thus making it look bigger
- Add these plants first in any plan you make
Structural plants
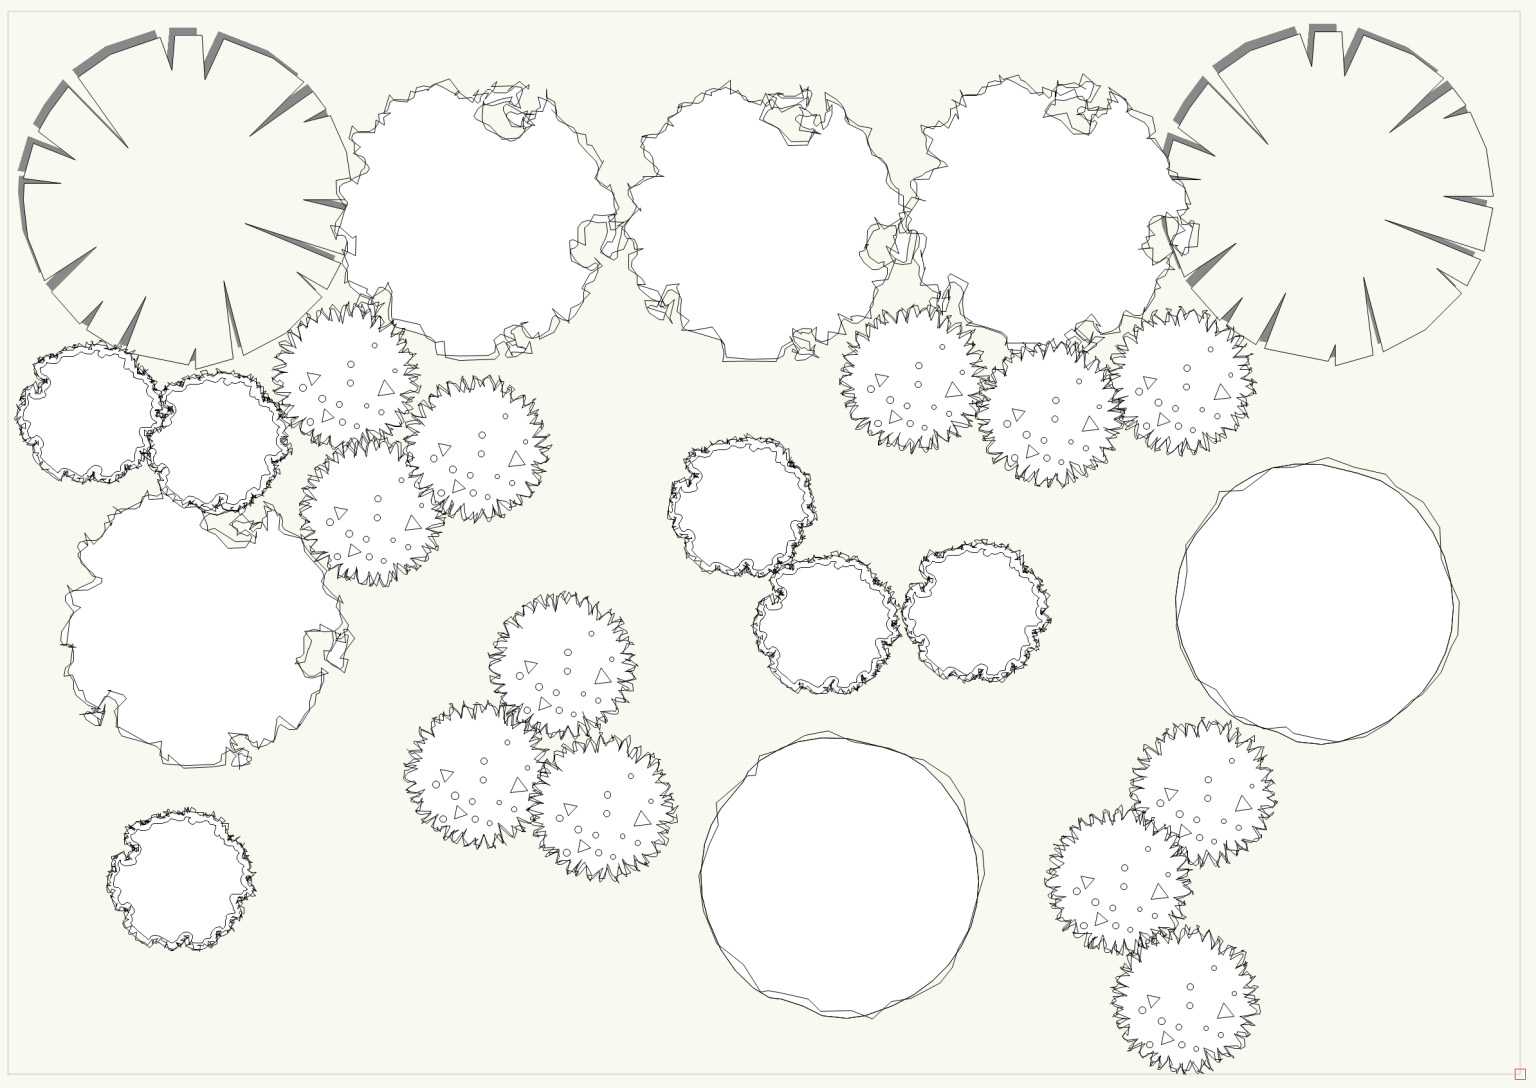
- Such as hedges and large shrubs
- These form the backdrop of your garden
- Add these next to your plan
Accent plants
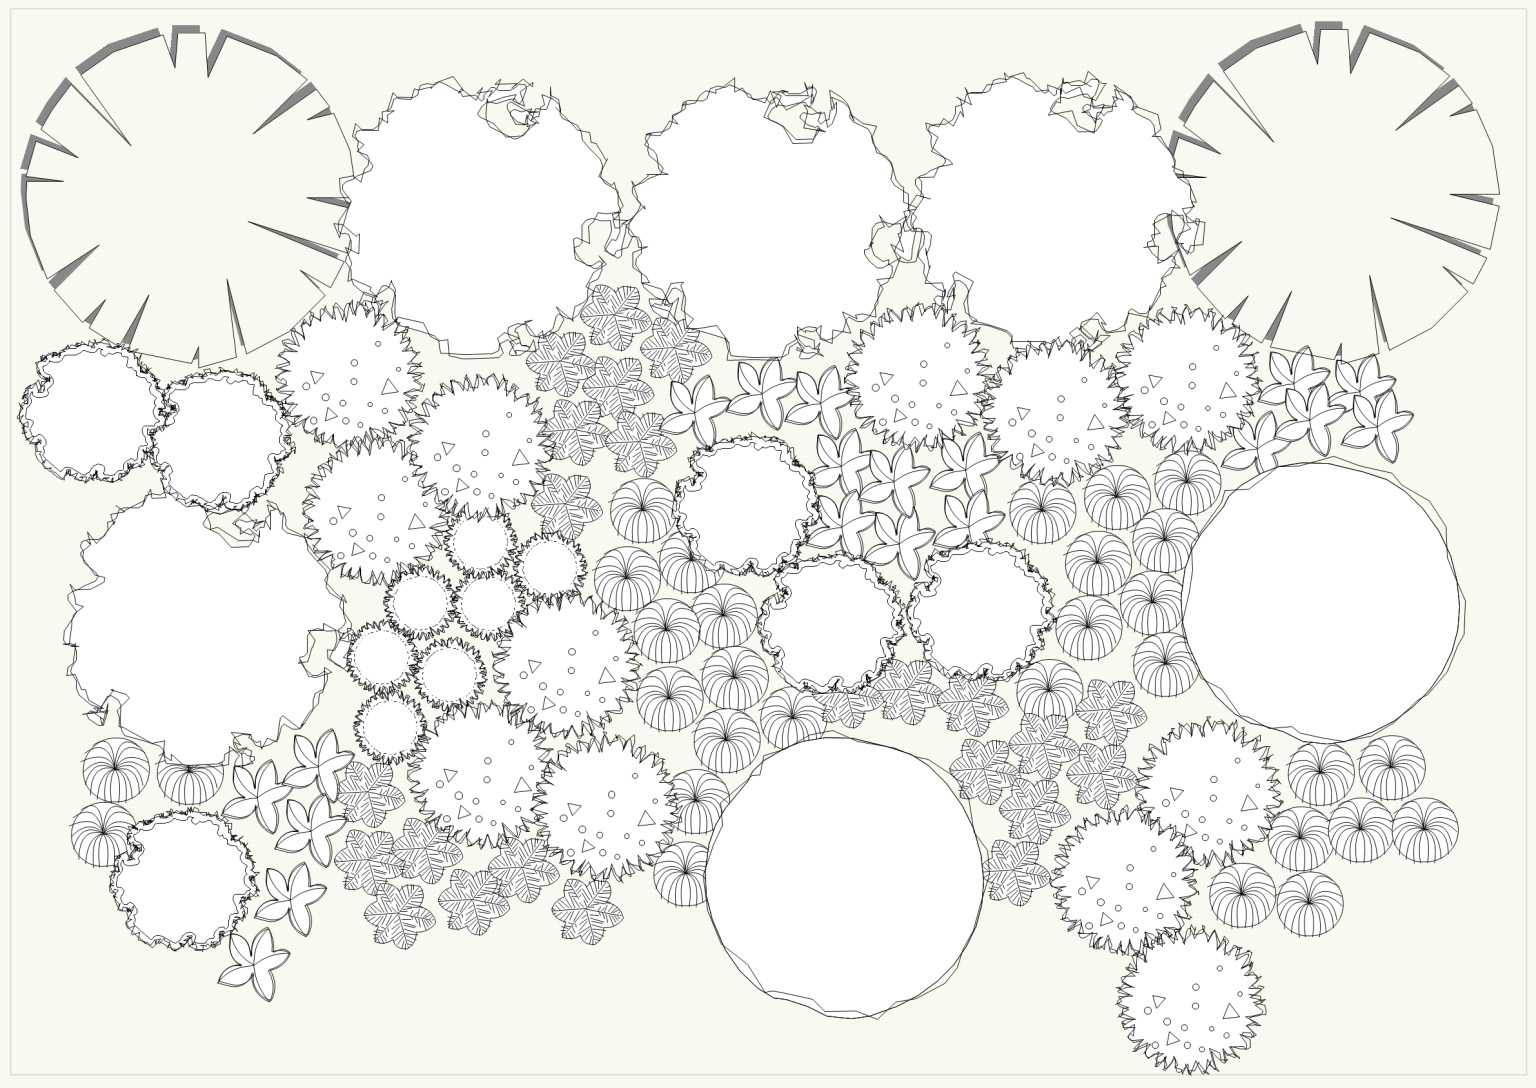
- These are a second layer of structural forms
- Such as small shrubs and sub-shrubs or larger ornamental grasses
- These add solidity to your garden
- Add these after the structural plants
Fillers
- Sometimes known as the pretties
- These are the perennials or bedding plants that fill the gaps between your structural planting
- Add these last
Note: The plants in the above diagrams have been added in groups. Grouping plants (in odd numbers) is a great way to get a professional looking planting scheme. It creates a more natural look, is easier on the eye and many plants look better amongst their fellows than they do on their own.
For a little more information on how to create a planting plan have a look at this video from my own garden design tutor: Duncan Heather.
Step 5. Understand Plant Form
Plants come in many different shapes – known as forms. Each of these creates a different effect in the planting sceme.

Rounded, spherical and globular
- These are common shapes, together with domed and mounded plants form the basis of most mixed plantings
- Clipped globular forms (i.e. buxus balls)
- Bold and eye catching
- Make good focal points
- Act as visual full stops in a border
- Spaced equidistantly (often in pairs) they
- Accentuate design geometry and
- Can also frame views
- Rounded trees can be used in avenues
- Single specimens become focal points – noticeable from a distance
Example plants
- Hebe ‘Emerald Gem’
- Sorbus aria
- Cercis candanensis
- Hydrangea arborescens ‘Annabelle’
- Buxus sempervirens

Domed and mounded
- Along with rounded forms, domes anchor most planting schemes and act as contrasts to more dynamic shapes
- Most common plant form found in nature
- Can be used to blur boundaries between garden and landscape
- Use domed or bell shaped trees and shrubs often throughout your garden
Example plants
- Viburnum davidii
- Pittosporum tobira ‘Nana’
- Crataegus monogyna

Conical and pyramidal
- Natural shape of conifers and many young trees
- Combine well with rounded and domed forms
- Provide a subtle contrast to the other plant forms
- Are formal, distinctive and weighty
- Give height and draw the eye upward
Example plants
- Liquidambar styraciflua
- Betula pendula
- Chamaecyparis lawsoniana
- Carpinus betulus ‘Fastigiata’
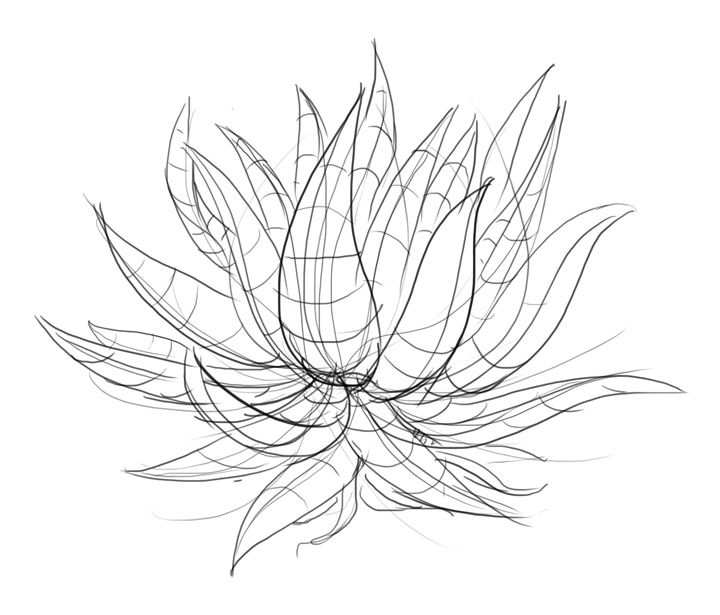
Spiky
- These plants create bold and interesting shapes
- As they’re common to hotter climates
- They go well with
- Formal Mediterranean,
- Gravel and
- Tropical designs
- They go well with
- Contrasting with rounded or domed forms, make good secondary focal points.
- Can be very dramatic plants (for example, palms) but don’t overdo them
Example plants
- Yucca filamentosa
- Trachycarpus fortunei
- Phormium tenax
- Agarve americana
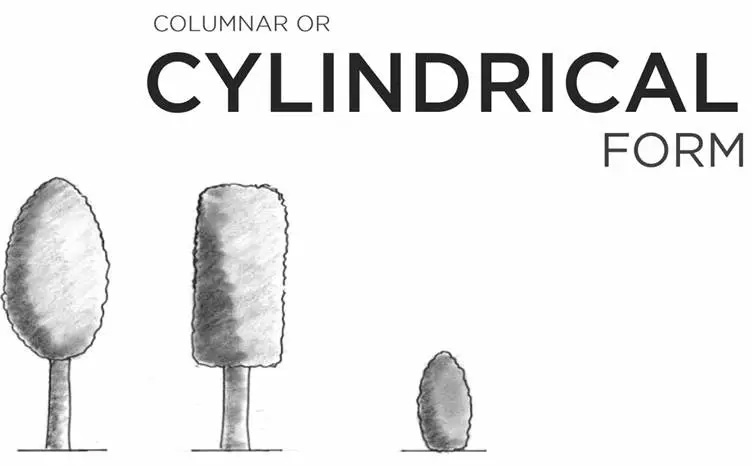
Columnar and ovoid
- Distinctive tall fastigiate (thin upright) trees and shrubs
- Make dramatic focal points
- Great in isolation
- Less good in groups or spaced equidistantly
- Pencil-like forms are more assertive
Note: Fastigiate means having the branches more or less parallel to the main stem
Example plants
- Taxus baccata ‘fastigiata’
- Juniperus scolpulorum ‘Skyrocket’
- Ilex crenata ‘Fastigiata’

Vase and Fan
- Vase shaped plants come in two varieties
- Broad
- These are graceful partners to other plants
- Use freely amongst your planting
- Narrow
- Attracts the eye
- Good focal point if used individually
- Can be grouped together but loses the dramatic effect if you do so
- Vase shaped trees
- Easiest to walk under
- Can create an informal arch if on opposite sides of a path
Example plants
- Miscanthus sinensis ‘Flamingo’
- Mattuccia struthiopteris
- Stipa tenuissima

Trained or Clipped
- These are not natural forms and are created by:
- Clipped hedges,
- Pleached trees and
- Topiary cubes
- They are striking and formal
- Enhance rectilinear design layouts
- Provide tailored presence against billowing grasses and perennials
Example plants
- Clipped Taxus baccata
- Buxus sempervirens

Irregular
- Amorphous and loosely shaped plants which cannot be categorised
- They play a supporting role in the planting and contrast well with strong architecture
Example plants
- Cotinis coggygria
- Rhus typina
- Aesculus parviflora
Step 6. Understand Flower Form
Flowers come in many varieties and forms. How these combine together can make a border look wonderful. Amongst these are the herbaceous perennials which can change shape dramatically throughout the year.
There are six universally accepted flower categories as devised by Piet Oudolf and Nöel Kingsbury.
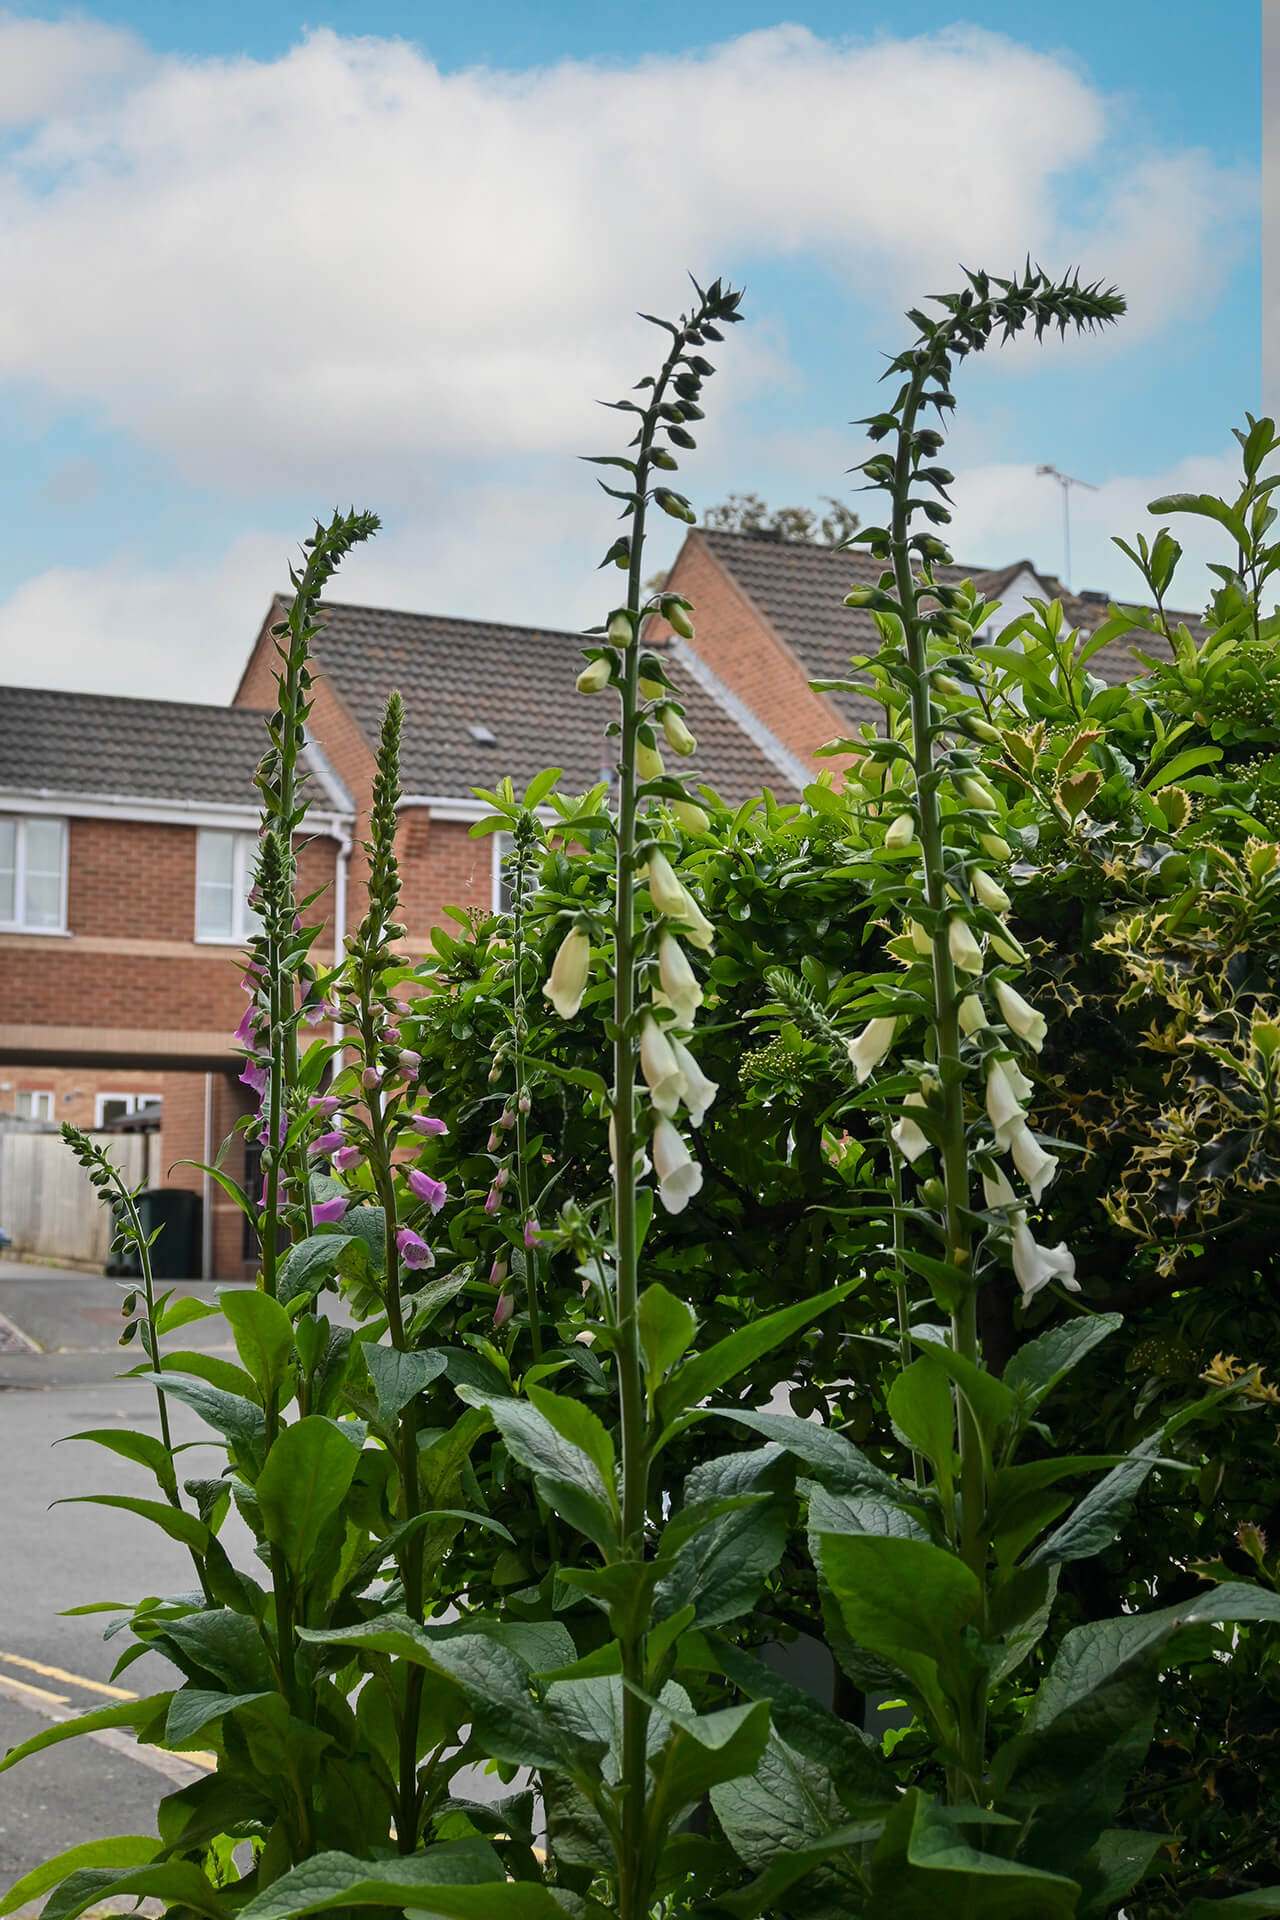
Spires
- Perform like columnar trees and shrubs
- Sparsely spaced single stemmed perennials can be very theatrical
- More delicate multi-branched spires have great impact planted in groups
Example plants
- Digitalis purpurea
- Digitalis parviflora
- Veronicastrum virginicum
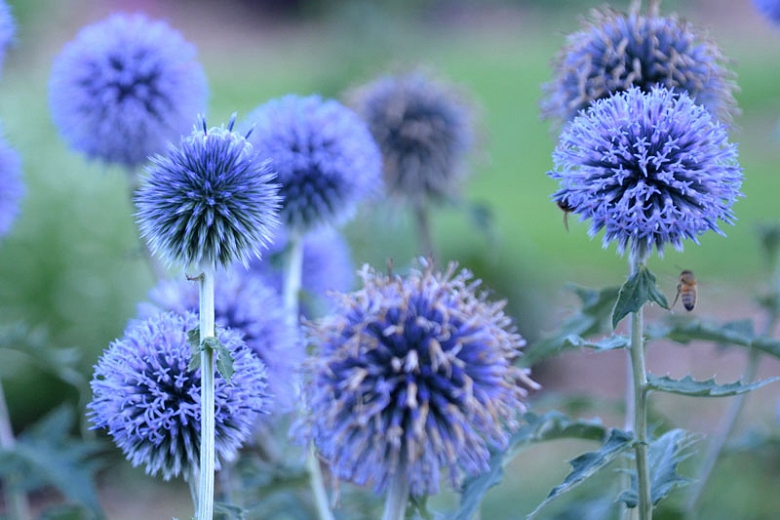
Buttons and Globes
- Perennials with globular flowers
- These contrast well with spires and grasses
- Less visually attesting than other flowers
- But very eye-catching
Example plants
- Echinops ritro
- Astrantia major
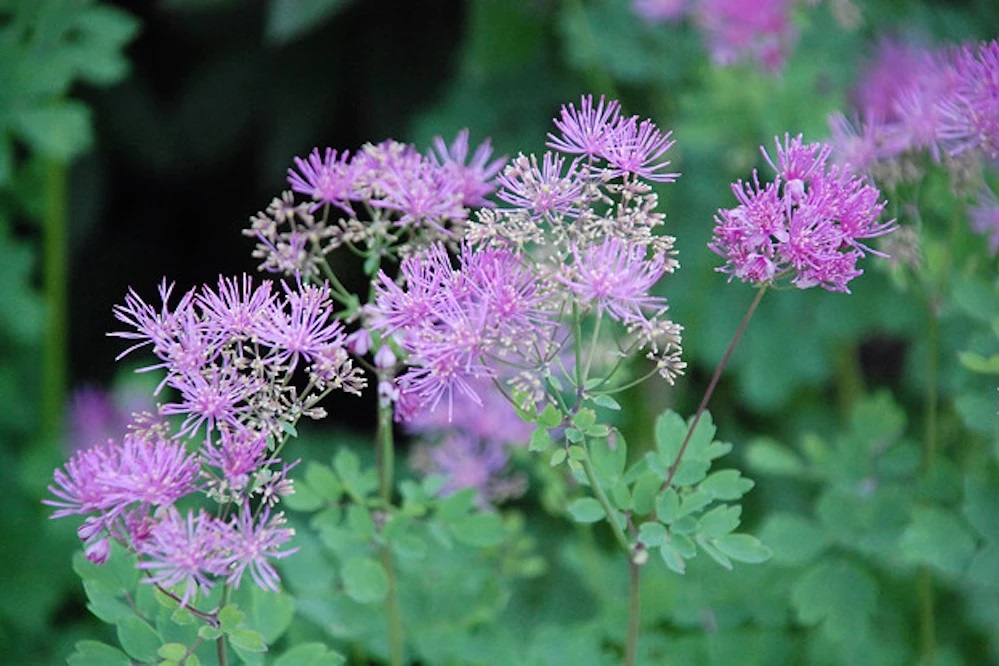
Plumes
- Airy and cloud-like plants
- Act as mounded plant forms
- Help soften the look of the border
- Plant in large groups for impact
Example plants
- Thalictrum delavayi
- Panicum virgatum
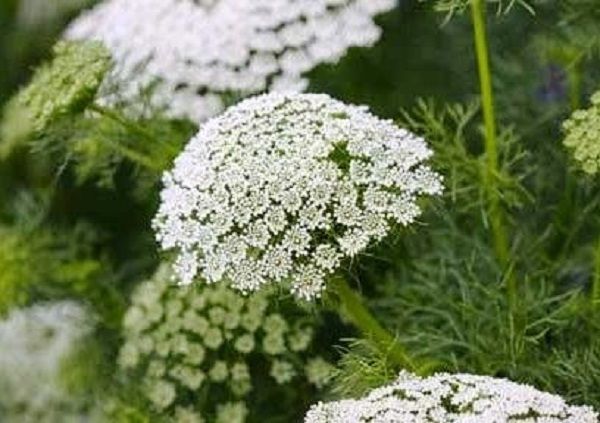
Umbels
- Rounded or plate-shaped flowers
- Similar aspect to domed shrubs
- Have a calming effect on pencil like flower forms
- Ground the eye with a natural look
Example plants
- Selenium wallichianum
- Foeniculum vulgare
- Ammi majus
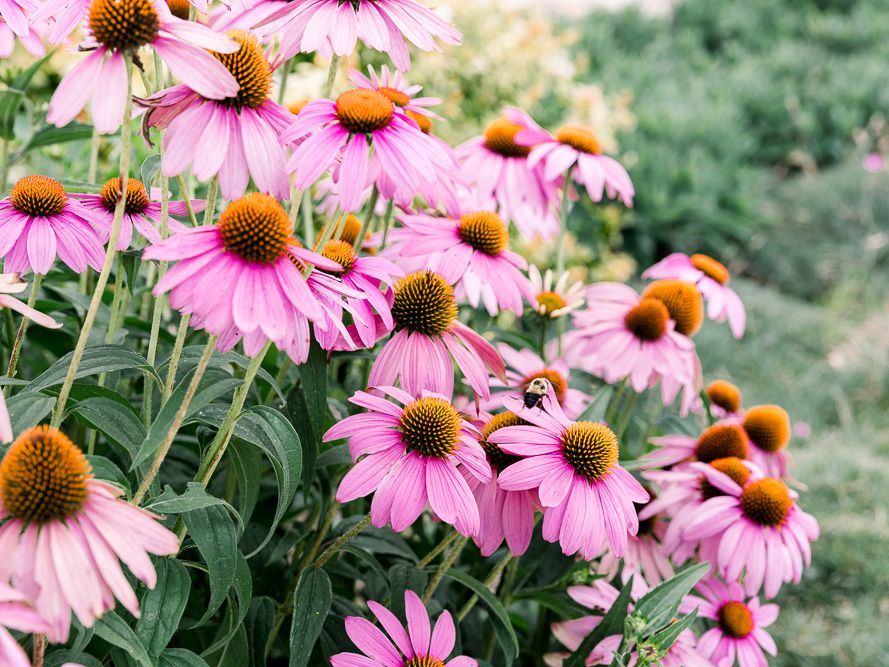
Daisies
- These are the commonest and most natural of flower forms
- These flowers play a supporting role
- Position at fore to mid border
Example plants
- Echinacea purpurea ‘Magnus’
- Symphyotrichum novi-belgii
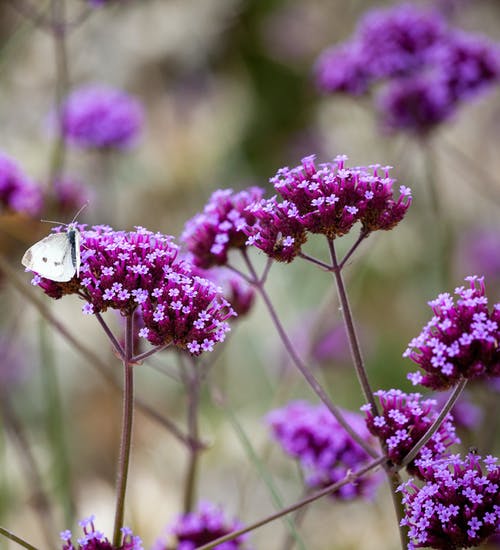
Screens and Curtains
- Light and lacy plant forms which
- Allow you to look through them to the planting beyond and
- Encourage the eye to investigate what’s beyond
Example plants
- Verbena bonariensis
Step 7. Understand Colour
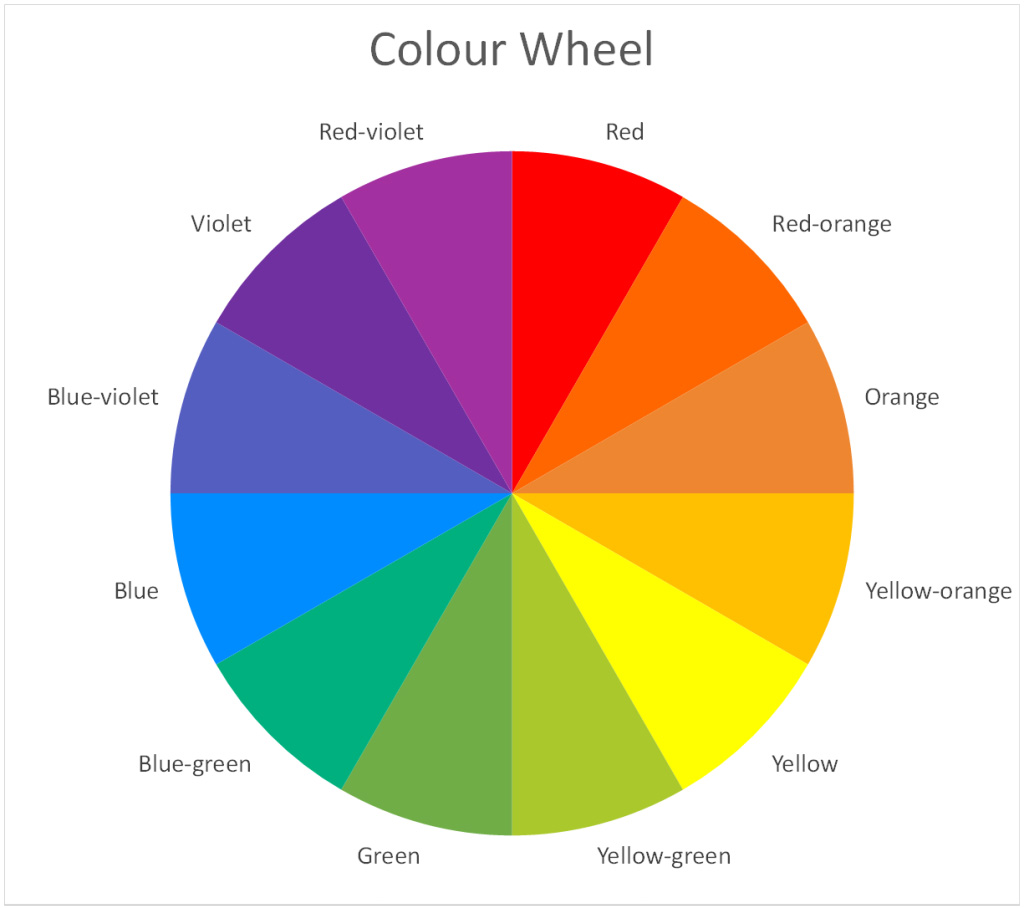
The Colour Wheel
Colour Categories and Combinations
The colour wheel is split into different categories
Primary colours
- Red
- Yellow
- Blue
Secondary colours
- Mixture of primary colours
- Orange = Red + Yellow
- Green = Yellow + Blue
- Violet = Red + Blue
Tertiary colours
- Mixture of the primary and secondary colours
- Red – Orange
- Orange – Yellow
- Yellow – Green
- Blue – Green
- Blue -Violet
- Red – Violet
Hues, Tints , Shade and Tones
- Each of the primary, secondary and tertiary colours can be further segmented using hues, tints shades and tones these being:
- Hue – a colour
- Tint – any colour plus white
- i.e. lilac = violet + white
- Shade – any colour plus black
- i.e. navy blue = blue + black
- Tone – any colour + grey
- i.e. gold = yellow + grey
Colour combinations can be broadly grouped into two main types
- Harmony and
- Contrast
Harmony uses adjacent colours
Contrast uses opposite colours on the wheel
Harmony
Here are some examples of using harmonious colour schemes
Monochromatic
- These use different shaded tints of only one colour (+ green)
- The look is bold and sophisticated
- Suits formal or crisp modern designs

Analogous
- Also called harmonic planting
- Uses colours that are adjacent to each other on the colour wheel
- i.e. Red, Violet-red and Blue-orange
- Each colour shares similar pigments and creates a natural looking and pleasing scheme
- Choose one colour to dominate with a second as support and third (or fourth) colours as accents to draw the eye
Contrast

Complementary
- Also called harmonic planting
- This creates maximum contrast
- Lively, sometimes electric combinations
- Especially if the colours are at full intensity
- Eye catching
- Use sparingly as focal points
- Combinations can be accentuated with
- Coloured walls or pot
hese combinations use colours opposite each other on the colour wheel
- There are six complementary partnerships
- Red and Green
- Yellow and Purple
- Blue and Orange
- Red-Orange and Blue Green
- Yellow-orange and Blue Violet
- Yellow-Green and Red-Violet

Triadic
- Uses colours spaced equidistantly on the colour wheel
- i.e. Blue-green, red-violet and yellow orange
- Intense colour selections lead to vibrant displays
- More muted colours lead to relaxing pastel combinations
- Green is usually the common but recessive colour with
- The two other colours added for contrast

Polychromatic
- A scheme made from the mixture of many colours plus their tints, tones and shades
- Very lively effect – even with pastel shades
- Choose colours with the same intensity
- Avoid mixing pastels and saturated hues
- Work best in naturalistic combinations
Step 8. Put it all together
There are nine golden rules of planting
Rule 1. Keep it simple
- Less is more
- Don’t be tempted to plant all your favourites in the same place
- Leads to a bitty, chaotic display
- Reduce the number of plants and
- Plant the remainder in larger masses
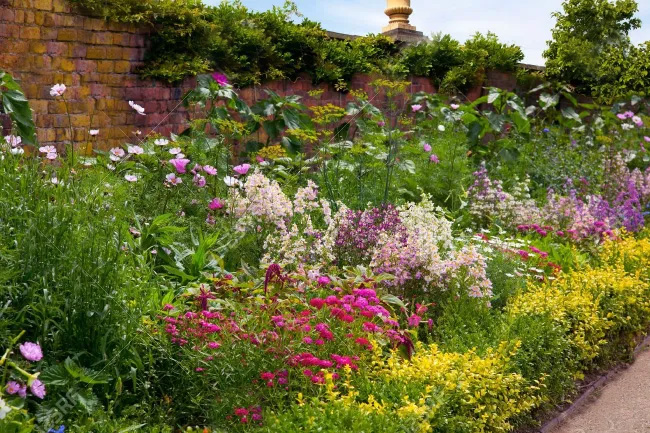
Rule 2. Widen the border
- The larger the border the better
- You can fit a larger range of shrubs, perennials and bedding plants.
- This can work in smaller gardens that are limited for space
- Avoid the thin border around the edges
- Maybe try a large border one side and climbers and containers the other
- This balances the garden, allows for a deeper planting but does not eat into people space
- Consider sacrificing a lawn for more plants
Rule 3. Scale and Proportion
- Consider the size of the garden you are planting in, the buildings that surround it and the areas to be planted
- Try and work with plants that are in proportion to your garden
- Avoid plants that grow too big or arrangements that look too small
- Notably large gardens need large borders with larger plants or smaller plants arranged into bigger groups
- In smaller spaces, height is needed from taller plants but be careful to limit the number of such plants otherwise it makes the garden claustrophobic
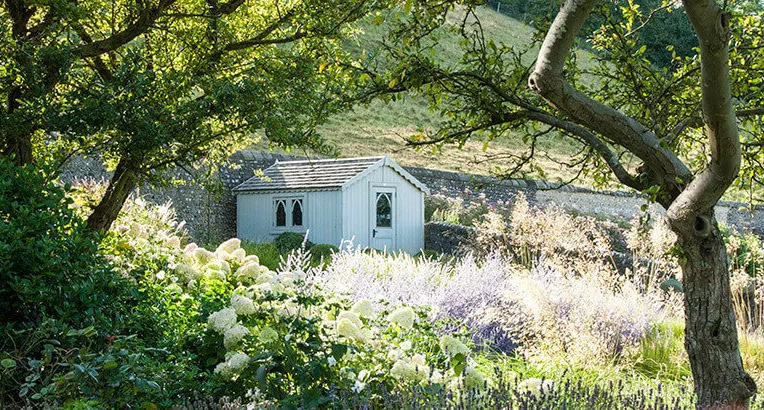
Rule 4. Unity
- This is the sense of togetherness of the design
- For example, If the garden overlooks the countryside, use similar plants, colours or forms in the garden as those seen in the view
- Site characteristics will determine what works well.
- For example, if the surrounding area is more open and wind-swept then a prairie style of planting may suit the garden.
- Try and work with the landscape not against it.
Rule 5. Repetition
- Unify planting by repeating plants with similar shapes or colours, these appeal to the eye and make connections that bring order out of the chaos
- Evergreen perennials
- Grasses
- Topiary
Popular reliable choices are:
Rule 6. Rhythm
- Rhythm in planting occurs when plants are repeated throughout the border or organised into sweeping drifts.
- Borders look better if the plants are organised in a distinct repeating patterns especially if these create change in height.
- The larger the planting area, the more rhythms appear in it.
Rule 7. Harmony and Variety
- Repetition of plant forms gives harmony but too much of the same thing over a large area can become boring. For example if the plants are the same colour. Variety adds the necessary spice.
- Add plenty of different plants.
- Different plant forms contrast with each other – leaf textures are most notable here.
- Try combining large leaved plants with plants who have medium sized leaves.
- Or medium leaves with finer leaf textures.
- Variation creates interest and harmony.
- Similarly combine large flowers amongst smaller blooms
- Especially if the flower shapes and colours are different.
- This contrast of forms creates a subtle variety.
- Beware: Distinct opposites will scream for attention – good if you want to create a focal point but uncomfortable if this is repeated throughout the entire border.
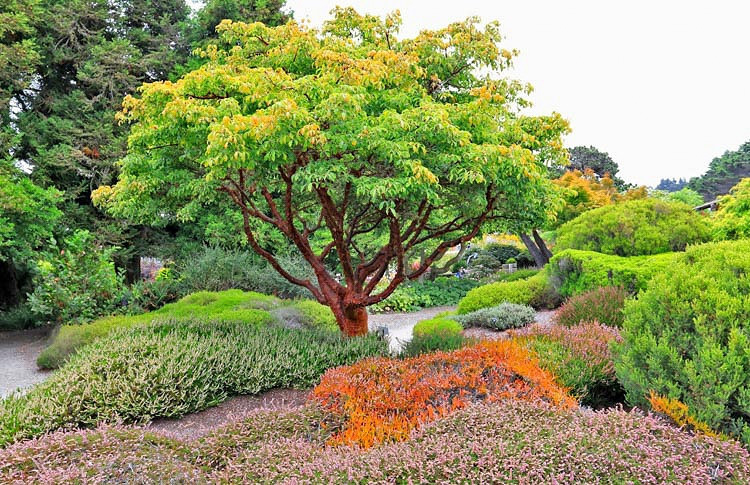
Rule 8. Focal Points
- All gardens need focal points. These can be:
- Plants,
- Sculpture,
- Furniture or
- Views
If you choose plants as focal points they need to have a strong visual energy, for example a distinctive shape.
Primary, Secondary and Tertiary focal points
Primary or larger focal points, like a tree, draw the eye from a distance and tempt you to explore the space around them. Up close the tree becomes a backdrop so you will need have a set of secondary focal point to draw they eye once you are there. Also include plenty of smaller scale accents or tertiary focal points in the border to add interest when you are looking at the planting up close.
Rule 9. Balance
- This is the state or equilibrium between elements in the garden
- A counter example may illustrate this best.
- The planting of large evergreens on one side of a path and nothing on the other looks odd and badly balanced.
- Central axis planting is the easiest way to achieve balance, one side of a path can balance the other. This can be done by creating a mirror image on either side of the central axis or by adjusting the planting into an asymmetrical balance.
- Volume balancing is another method. One large shrub can be balanced by a group of 5 smaller shrubs.
- It is a bit of an intuitive thing. If it feels right, it probably is.
Step 10. Plant Research
All the above tips and rules will not work unless you know the details of the plants and trees you hope to add to your garden. Do your research look for the type of plants that you want to use and check if they will work in your garden.
There are a number of online resources that I like to use myself for plant research these being:
- The RHS plant finder
- The Shoot Gardening plant database
- Worth joining (for a small fee) to get regular emailed plant schedules and care notes
Larger online nurseries are also useful sources of information, notably
Further Reading
Three books I can’t do without
Tell us what you think
We hope you enjoyed this article. We'd love to her what you thought about it.
Feel free to pop your comments in the form below.
Thank you for getting in touch!
One of our colleagues will get back to you shortly.
Have a great day!
